Sunday, November 27, 2011

Weekly Plan–Week 48

So I have been a bit MIA this week, it was a busy week of finishing baking and getting ready for an open house for our house this weekend.

So here is the weekly plan, I’ve stepped it back up a bit as I was getting lazy with all the baking I was doing but I am done the baking and onto decorating (YAH!) so I can get my cook-on again.  (I also realized I was a week behind on my count, so skipped to Week 48)

Weekly Plan - for posting.xlsx

So here is the plan for this week -

Monday – Making super easy tomato soup following Our Best Bites recipe, along with some yummy home-made buns my MIL sent home with us this weekend.  I have some apples to get ate up so I am going to use the slow cooker to make some stuffed ones.

Tuesday – I am trying to get my youngest to eat more vege’s so I am going to try to make this carrot pudding and see if he will eat that.  (Another slow cooker recipe)  And the chicken recipe is another Best Bite recipe – Spicy Honey Chicken.

Wednesday – Is run around day for me.

Thursday/Friday/Saturday – Are all slow cooker meals

Sunday – We got to go to a kids Christmas Party and see Santa.

Tomorrow I get to start to decorate!  I already made one thing for my walls and plan to make another thing tomorrow…I will also be making an advent calendar tonight for my boys, share more later.

Tuesday, November 22, 2011

Chocolate!

What is Christmas without some chocolate!  I tend to buy most of mine but I do have a couple of things that I make.

Chocolate House 1

First being a Chocolate House!  (Excuse the bad picture, this is from last year I didn’t have any that were better.  I won’t be making this until closer to Christmas and I will be giving it to my dayhome’s family.)  My kids are a bit too little still for something like this…they climb the walls without chocolate so this would put ME over the edge!  Haha

To do this I have some molds and once all the pieces have been made I assemble it, sticking it together with melted chocolate.  Then go to town decorating it with candies and chocolate (using chocolate as the glue)…use white chocolate to make the snow.  Pretty soon I will let my munchkins decorate one for the family…I remember doing it when I was little and loved it!

I am also going to make chocolate turtles, lots of people make these, BUT mine actually look like turtles!  I have 2 sizes of molds that I use to make them and they are also my favorites.  I fill the molds with chocolate until they are coated, then let it set.  Once it is set I place some caramel sauce in them and top them with Walnuts and finish with a layer of chocolate and then freeze them.  Yummy, can’t wait to make them later this week.

turtle molds

For the caramel sauce I use Sweeten Condensed Milk (a lot of people don’t know you can do this…it is yummy and stays soft).  In the past I have boiled it in a pot for several hours and then let it sit in the hot water over night…usually it works out but not always.  I happen to see a tip on Pinterest (I have it pinned under Christmas stuff) that said to put it in a slow cooker for like 8 hours on low and then place in the fridge overnight before opening it…I am going to try that out this year and see if it works.

Caramel sauce

One day I will attempt other chocolates but that is my limit right now with little kids hanging off me.  What family tradition chocolates do you have?  I would love to hear as I love trying new ideas!

Monday, November 21, 2011

Week 4–All About Finishing Gifts and Food

imagesCA23VZRI

This is my built in, catch up, week!  Sometimes my brain tells me that I have lots of time…it whispers in my ear “Remember that extra week you gave yourself” …well, this time I didn’t listen to it and I am in pretty good shape.  I have basically all my shopping done (just a few things for my own kids and some stocking stuffers) and I still have a couple of things that I have to make, and almost done my baking.  I just have wrapping and some chocolates left to make. 

The big thing I have to get finished is our Christmas card!  I am all about the cheesy Christmas card so I have to set the scene and I need the decorations out for it.  I have some idea’s that I have been seeing on Pinterest that I may copy, most of them are outside so I would just need a couple of things…some examples are (all links to the pictures can be found in my Pinterest Christmas album) -

So cute but my husband would NEVER go for it.

candy canes

Also adorable but my dogs would never go for it!dog and wreath

And I really can’t see my boys letting me do this…in lights

Apparently my family isn’t all that easy to work with!  Haha  I will think of something and get one done soon, might be a project for this week or weekend.

And just to get the panic going for everyone – THERE ARE ONLY 33 DAYS LEFT UNTIL CHRISTMAS!!  (Check out this cool countdown I found on the web - http://www.xmasclock.com/)

I have my list getting worked on - I do up a big To Do list that sits on my counter and I look at it everyday and try to get one of those things done each day.  This is on top of the weekly plan of baking, shopping and wrapping, as well as the normal cleaning that I do each day.  Makes me busy when you add any kids activities.  I don’t go to hard on this list as it is usually the more fun things I want to do and I can get most of them done in December after all the other things are done.  This is why I work so hard in November…

How about the rest of you?!?  Are things getting there?  Keep it up, the fun is about to start…next week is decorating and crafts!

imagesCAJXIS6T

Friday, November 18, 2011

Christmas Cookies (edited Nov.28)

I am going to share with you a couple of my families favorite cookie recipes and another of my own that I love to make at Christmas but also make other times with my oldest.  At the bottom of each recipe I also share some tips I have figured out to make things a bit easier.
Whipped Shortbread Cookies (my mom’s recipe)
Every time I try to double this recipe it doesn’t come out as good so take that under consideration.
2 cups of butter – at room temperature (good butter, don’t cheap out it’s Christmas!)
1 cup icing sugar 
1/2 cup corn starch                                                                                      
3 cups flour                                                                                          
1 tsp vanilla                                                                                 
Small candies (M&M’s or Smarties) or candied Cherries
  1. Put butter in your mixer and beat until slightly fluffy, then add the icing suger and beat until fluffy again.
  2. Add the corn starch, flour and vanilla and beat…keep going…it takes a while…until it is all nice and mixed and super fluffy.  (The fluffier it is the more it will melt in your mouth.)  DSC03587
  3. Start preheating the oven to between 300F and 350F, I use 325F.
  4. Now you can put cookie drops on the baking sheet or use a cookie press to get the nice flower and tree shapes.
  5. Add a candy, candied cherries, or something on the cookies to mark the middle (for the flower) or top (for a tree) as an added treat, kids love M&M’s.
  6. Bake for approximately 15 minutes.  (Ultimate temperature and length of time depends on your altitude but just keep a close eye on the first pan and watch for slight browning on the bottom edge of the cookie and take them out…there is no eggs so no chance of salmonella poisoning so don’t worry too much).
When my Munchkin is helping me I tend to use my small cookie dough scoop, easier for him to use and he likes to mash down the cookie ball.  But I do use a cookie press when he gets tired of making the cookies with me.  A trick that I read somewhere (I read it last year and can’t remember or I would give them credit) is to freeze the cookie sheet.  This makes the cookies stick to the frozen cookie sheet instead of sticking to the gun (you know, the whole tongue on a frozen pole that EVERYONE has done at least once in their life)…it really works and it saves you from eating all the cookie that don’t turn out…I mean, you could just put it back in the press but what is the fun in that!  Smile

Brown Sugar Shortbread (my mom got this from someone else)
1 cup butter – at room temperature (once again, use good butter)
1/2 cup brown sugar                                                                                        
1 egg yolk                                                                                                         
1 tsp vanilla                                                                                                         
2 cups flour                                                                                                      
1 tsp baking soda                                                                                              
Pecan’s  (optional)
  1. Put the butter and sugar in mixer and beat until fluffy.
  2. Add the egg yolk, vanilla and baking soda and mix in.
  3. Add the four and then beat until fluffy (can take a long time just like above). DSC03574
  4. Preheat oven to 300F
  5. Roll into 1 inch size balls and place on baking sheet, then flatten twice with a fork making a criss-cross design.
  6. Top it off with a Pecan or chocolate or whatever you want. DSC03577
  7. Bake in preheated oven for 15 mintues.
These cookies are delicious and not as sweet as the traditional shortbread.  The first time I had them I didn’t really like them but now they are my favorite!  I use my little cookie scoop for these as well, then all the cookies are symmetrical and it takes less time than forming each ball of dough.
DSC03579
Sugar Cookies (Our Best Bites)
So I follow the Our Best Bites Sugar cookie recipe, although I just change the amount of flour I put in it – they call for 3 cups of flour but I put about 2 and 1/2 cups of flour – this is due to elevation changes and things like that.  (I also prefer the almond extract but can no longer use it as it turns out my husband is allergic to almonds…guess that was the little itchiness he got in the throat…ooppps.)  They also have some awesome decorating suggestions!
A couple of tricks I have for these (as they take time since you have to cool the dough, roll it out, make the shapes…) are -
  • Roll the dough out between PARCHMENT paper before you cool it.  This way you don’t add more flour to the dough (which makes them a drier cookie) and you don’t get a sticky/flour mess on your counter, so less clean up.
  • Now, something that I didn’t know (as I confused PARCHMENT paper with WAX paper) is that parchment paper can go in the oven.  So this helps you out big time and here is how -
    • Cut out your shapes in the rolled out dough after it has cooled (little ones love doing this) and then peel out the left over dough.  Slide the parchment paper onto your cookie sheet (the best are the double walled ones with no sides) and put them in the oven.  (*IF you do this make sure to leave space between the cookies as they do raise!*)
    • When they are cooked you can take them off the paper and they are perfectly shaped.  No more trying to pull the cut cookie off the counter or wax paper to move to the cookie sheet…also, you don’t have to clean the cookie sheet after!  Win-Win!  (And I think that parchment paper is compostable…but not 100% sure)
  • Another thing I do is put sprinkles on the cookies before I bake them.  This saves having to decorate them afterwards (and both kids like to do this…easy for even a one year old).  I don’t do this to all of them, I save a few for Munchkin#1 to have some fun one afternoon decorating them but they aren’t the pretty ones…that is for sure.  Sometimes I am more ambitious and decorate them all pretty but I usually don’t have time.
sugar cookies
Those are the cookies that I made this year.  I usually make more but these will do.  I also have some Turtles, chocolate houses and squares that I will be making…share those later!
Happy Baking!

Thursday, November 17, 2011

Weekly Meal Plan

So how is everyone’s baking going?!?  Good, not so good?  Mine is not so good.  Sad smile  I had planned on getting a lot done today but we got hit with a massive snow storm (which you think would make us stay indoors and hibernate) so between boys climbing the walls and shoveling the snow I got NOTHING done!!  Good thing I have Week 4 as the catch up and finish your shopping, gift wrapping and baking…I know I always have grander plans then I get done so I built in some extra time…I always hope that my brain forgets that I have more time and dilly dally’s that away too!  LOL

Here is the Meal Plan for next week.  Not too much and no baking as I am finishing up Christmas baking.

Weekly Plan - for posting.xlsx

Has anyone noticed that my snacks barely change…simpler that way.  That doesn’t mean that I don’t give or eat different things but I just plan on the usual snacks so I always have them on hand.

Happy Meal Planning!

Wednesday, November 16, 2011

Party Idea’s and Table Settings

I decided that I wanted to spend some time looking at pretty table settings and party ideas…there are so many out there that I thought I would share my favorites and just dream of the day that I can host one.  Smile

Some beautiful table settings -

Oh Martha, we can always count on great DIY idea’s from you!

Martha Stewart12-18-Christmas-Inspiration-copy

Martha Stewart

I found this one on Pinterest, it was just linked to a blank page and I didn’t see it anywhere else…

Pinterest

This one is from Pier 1, so pretty…

Pier 1Pier 1

There is so much else out there but I am a bit of a traditionalist…I am a red and green Christmas kind of gal but this year I am branching out a bit and adding silver and gold!  Smile

Some Christmas party ideas that I found were -

  • How the Grinch stole Christmas…wouldn’t that be fun!  I wish that there were pictures but there were some games and ideas...I think great with kids as you would have to dress up a bit to make it work.
  • White Trash Christmas – would probably be fun but not my kind of party.
  • Christmas sweater Party – I’ve heard of these where the person with the worst holiday sweater wins a prize, I think this would be a fun party.
  • Christmas in July – where you serve drinks and food to make everyone thing is it July.
  • Or just a nice and fancy party – this is the kind of party I would love to one day host, one with just adults and some fancy food and drinks and good company…dress up would be optional but nice as I rarely get to do it. Smile

Don’t forget to make sure you have good music and that your place smells great, if the food you prepared doesn’t overwhelm the house then you could add other nice scents like placing a small pot on the stove with a little water, orange and lemon rind and some cloves and cinnamon and boil it for a bit…so nice.  (I have done this before I have a house showing…makes a nice homey smell.)

And beverages, decide in advance if you have the budget to provide the beverage or, to save a few dollars, choose a theme drink and let everyone know what it is and that anything else wanted by the guest they will have to bring with them.
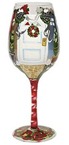
31lDTXJ36NL__SL500_AA300_  T_WithZoom235xtr01-spl

(Isn’t that Santa wine holder awesome!  I want one SSSOOO bad but it is from this fancy store and costs $350 so it isn’t going to happen.)

Some party tips -

  • Do shopping for non perishables a few days ahead. Buy all fresh ingredients the day before the party.
  • Make ahead any dishes the recipes allows for 1-2 days ahead, or even further ahead if you can freeze it!
  • Do as much prep work the day/night before to limit the amount of work the day of the party.  
  • Clean the house a few days before the party so all you have to do the day of the party is light clean up.
  • During the party, have an area for the dirty dishes to go, have a couple of boxes (or recycle bins) – one for glassware and the other for dishes.  This keeps them out of the way until you can deal with the dirty dishes.  
  • I love this last tip…this is what I do when unexpected visitors come or I have a house showing - Put pots and pans back in the cold oven and in the morning move everything to the dishwasher or hand wash.

Some Dinner menus ideas that can basically be made ahead of time and reheated before the party are (beside the main dish which generally needs to be cooked the day of the party) -

  • Appetizers – find ones that can be made the day before
    • A cream cheese spread (like surprise spread or chipotle-apricot spread) can be made the afternoon/evening before and just refridgerated until you bring it out for an appetizer.
    • Cheese, meat and vege tray are also great for appetizers and you can prepare ahead or easily purchase them to pick up the day of the party
    • Some mixed nuts are a Christmas favorite too
  • Salads – prepare everything the day before but don’t mix it together until right before serving them
    • Citrus salad with red onion and bacon is always a favorite for people I know
    • Spring salad for those non-adventurous people
  • Sides – These item generally needs to be cooked the day of the party but you can do all the pre-work the day before
    • cooked vegetable like balsalmic glazed carrots or green bean casserole
    • some sort of potato, like mashed or scalloped
    • fancy rice, but that usually takes a lot of time to prepare
  • Main Dish – Generally the meat dish (check if you invited any vegetarians!)
    • Around Christmas this tends to be a turkey, ham or roast.  Not too much work into these and needs to be cooked the day of the party.
  • Dessert – my favorite this time of year…so many awesome ones to pick that I tend to make 2 or 3…definitely too much but I don’t care, I want them AAAALLLLL!!!
    • I always make a cheese cake (baked cheese cake is super easy even though it took me years to even try them as they seem so hard), this year I want to make a White Chocolate Candy Cane Cheesecake.  Another cute thing to do is bake a normal cheese cake (would work with a no-bake one as well) and mark out your squares and decorate each one differently with a Christmasy theme, just use gel icing tubes.
    • Make a cake, any kind, and you can use chocolate to make things like Christmas trees or snow flakes and use them to decorate the cake.
    • Put out your holiday cookies, squares and chocolate

175570085442792916_551sdFHO_c

(Doesn’t this look fantastic!  Found it on Pinterest but here is the site with more details)

Mmmmm, now I want to throw a party!  Last year we did a pot-luck party and it was a lot of fun…we will have to do it again this year unless someone else wants to host it this year!  Winking smile  One day I WILL host a nice and fancy party!

Holly Border

Next I will share some of my families favorite cookies and some little tricks I have picked up over the last few years…so until next post, happy planning and baking!

Monday, November 14, 2011

Week 3–All About Food

Well, how did your gift planning and shopping go?!?  Mine went pretty good, I have a couple of little gifts left to get and a few things to make but otherwise I am all set.  I still have to do all the wrapping but I am taking a break from that to begin my Christmas baking.  I am not going to be doing as much as I would normally do as we have our house for sale…although if I bake a ton then I am sure the house will sell just so I have to move all those baked goods!  LOL

Christmas Baking

So this week I start to get my baking organized and I try to get a good chunk of it done.  With proper planning you can have all of your cookies, squares, candies and chocolates done within a week or 2 AND you could have a lot of the food prep done for any parties that you might host!  I have always done my cookies and other baking up with no problem but always struggle with the dinner parties part…I either don’t host them or have had potluck dinners so that I don’t have to prepare too much food.  I have wanted to host a full party for sometime now so I have been researching ways to do this and NOT be stuck in the kitchen.  (I’ll have some idea’s below and may post a sample dinner later this week…maybe I’ll have to host a party…)

Baking -

  • Start by finding all your favorite Christmas cookies recipes and decide which (if not ALL) of them you will be making and put them in a pile.
  • Pull out all the other special yummy recipes you have (bars, squares, chocolates and candies) and pick the ones you want and put them into a pile.
  • Now start looking through your pantry at all your baking stuff and start making a list of things that you need to do your baking – the obvious things like butter (which I start buying in October whenever I see it on sale…it freezes really well), eggs, sugars, flour, but don’t forgot all those specials items you need which make Christmas baking soooo good.
  • Now the obvious – go shopping!  I make this a special trip that I take just to get baking supplies so that I don’t forgot anything while I am also trying to do my weekly shopping trip.  (Plus, who doesn’t like to have another excuse to leave the kids with your husband so that you can take your time shopping and possibly enjoying a coffee…maybe that is just me!?!  LOL)
  • Plan how you are going to do your baking.  I usually like to mix the dough for cookies and other things that need to sit in the fridge for a bit so that I can make other items while I wait on those.
  • Then get crackin’!  I do my baking fairly systematically but I also usually have my oldest helping me so it can generally be fun and messy.  Basically I make each item, have them cool for a couple of hours and then place them in the container.  I leave the lid off the container for another couple of hours and then the lid goes on and it goes into the freezer (which is why the freezer needs cleaned out). 

As for storage, use freezer friendly containers or bags and if you are short on freezer room you could also put the items into a cooler on a deck or outside (in cold weather areas like Alberta where I live).  I suggest using a cooler so that it has a good lid that will stay closed in the wind and keep snow off, as well as keep animals away.  You could also store in a garage (as long as it’s not heated or has heated floors) as will be as cold – probably colder – than your fridge as well.

Hosting a Party -

  • I gave a free printable in the Week 1 post for party planning that contained a meal plan, shopping list and guest list.
  • Plan your menu but keep in mind how much time you want to spend in the kitchen
    • Have only 1 or 2 items that will need prepared or cooked that day
    • Plan other items to be prepared ahead of time and either froze or stored in the fridge to be heated up the day of the party.  (Make sure that you don’t store things in the fridge longer than a few days…last thing you want to do is accidently give your guests food poisoning!)
    • Buy some of the items, you can get some very yummy appetizers from the stores.  If you don’t want to get those generic items from the grocery store then look for a specialty store in your area, or a person you know that might make some items to sell to you.
  • Plan for your guests, how many are coming and whether you have enough seats and table settings for them.  Then beg, steal or borrow them from people you know…well, maybe just borrow as it is Christmas and you don’t want to be thrown in jail for stealing!  LOL
  • Now (potentially) the fun part – decorating and table settings.  I have small boys so my decor is very simple, as is any table setting as they are also climber.  But one day I hope to throw a nice party with pretty decor and a beautiful table all set up.  There are tons of beautiful pictures in the blog world and on Pinterest (one of my other addictions…besides fancy coffees).
  • Invite your guests…don’t forget that part!  Winking smile  Either phone them all, send out emails or you could do formal invitations, they can be fun to make if you have the time…but try to make sure to use recycled material.

Some other things that you can do to make your life easier for December is try to pre-plan and prepare some of your meals.  You have a party to go to, or event to attend that isn’t serving food, then pop one of those prepared meals out of the freezer and into your oven/slow cooker/microwave and you are all set.  Also, keep on top of the cleaning schedule!  If you follow each daily cleaning item then it should only take you an hour or two a day to keep your house in pristine condition…ready for any last minute visitors!imagesCAJXIS6T

So that is All about the Food.  I will share my whipped shortbread, brown sugar shortbread and my sugar cookie recipes along with some quick and easy tips to make preparing and baking them much easier.  I will also share a couple of chocolate fun things that I make, super easy and very yummy!

So how is the other organizing going?  Have you got your Christmas card list all done up and ready to go for mailing soon?  What about clean up?  If you have been following the Chore list that I shared you should have your fridge, freezer and deep freeze done and be working on your pantry…just in time to be making a Baking shopping list and storing all those wonderful goodies!

Keep at it, in 3 short weeks you will be ready for Christmas and you will have a stress-free and enjoyable December!